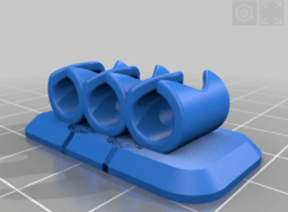
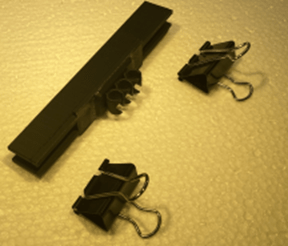
 Happy New Year! However, the Chinese curse is still with us. Not talking about COVID 19, although that IS still with us. I’m talking about the curse that goes, “May you live in interesting times.” I’m going to try and make the best of 2024. One of the toughest things for me to do is throw things out. My favorite activity is making things. It’s particularly rewarding when I can improve on things that I already own or, better yet, use materials that I find. Throwing things out represents a failure to me. Unlike Marie Kondo, I get no pleasure out of discarding stuff. Particularly, if I remember how much money I paid for the stuff and I have a good memory. I often tell people that I’m a cardboard box short of being a hoarder. But things wear out and if they can’t be salvaged for parts, they must go. I’m beginning to believe that about relationships too.
 Sunday was the last day of 2023. Nancy and I don’t go out on New Years Eve. This year we had some friends over to sing Karaoke and keep us awake until midnight. This was new for us, and we realized that we’d not have a big crowd because there were quite a few celebrations and many of our friends are a bit more active than we are. We had seven people join in and it was a good time. There were plenty of opportunities to sing before midnight. Earlier in the day, I used my remote fire making skills to wire up
 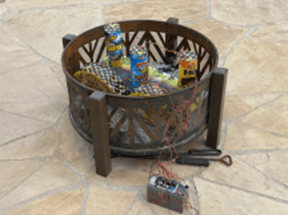 a fire basket full of fireworks. We had champaign and sparkling cider, noise makers, and handheld sparklers to welcome in the New Year. The weather was “Tucson mild.” A light jacket was all that we required.
 A few minutes of “oohing” and “aahing” and drinking and we were back in front of the Karaoke machine. The songs were varied: A Country song, followed by a show toon. There were folk songs and plenty of oldies. Everyone got a chance to sing eight songs if they wanted.
I didn’t sit down to write this blog and tell everyone about our New Years Eve party. I sat down to show off my latest improvement to my workshop environment. On Facebook a couple of days ago I posted a picture of my workbench. I had just cleaned everything off it and it looked like an invitation to start a new project. My workbench came from Harbor Freight a few years ago. It’s really made for woodworking. So far, I’ve made a few improvements.

 I added a cut-down Fiskars self-healing mat. I replaced the side runners on all the drawers so that they would pull out enough to reach the items in the back of them. I added shelving and lighting above the bench along with a power panel. I also added a “long bar” power strip along the front to support any corded hand tools. The last thing that I added was a way to mount a bench vice without ruining the surface of the bench for woodworking projects.
In honor of this being a new year, I wanted to make a better-looking bench vice mount. The one I made out of scraps of wood worked but not as well as I wanted it to, and it was UGLY. I drew up a new one on Tinker CAD and sent the file to be produced on my Bamboo Labs x1 Carbon using black ABS filament. Six and a half hours later, I had my finished mount. It took a little adjusting because I didn’t get everything perfect. Here it is:
Beautiful, isn’t it?

 Admittedly, this article is for the truly Halloween/Technology obsessed.


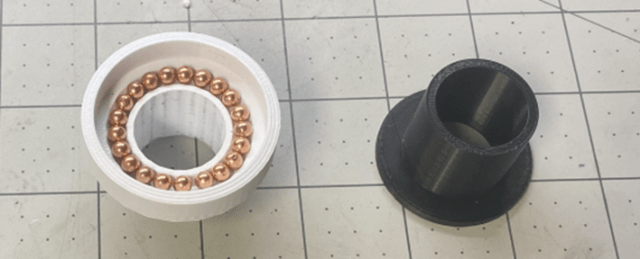
 The wolfman started out as a Halloween costume. The costume is laid over a ¾” PVC framework. There is a bicycle seat inside the wolfman’s head, and the bicycle seat is attached to a ½” PVC pipe that passes through a ¾” PVC “cross” connector. Wolfy’s head pivots. The ½” PVC pipe easily passes through the “cross” connector with room to spare. Inside his chest there is a small motor, the type one can find in a Christmas lighted reindeer lawn ornament. The rotation from that motor passes up through his neck and rotates the head back and forth. However, the fit is sloppy. To solve that problem, I designed a bearing that makes the ½” PVC pipe fit snugly inside the ¾” cross piece.

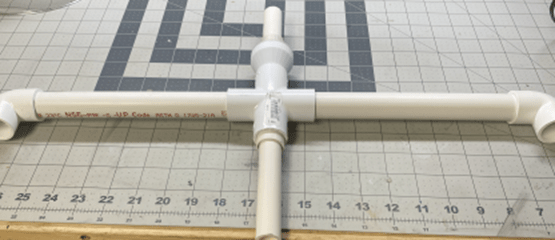 The ball bearings are Daisey BBs. The top and bottom races were designed on TinkerCad and printed on my Bambu Labs 3D Printer.
 Another 3D printed part is attached to the neck pipe within the chest cavity of the wolfman. A short link converts the round and round rotation of the reindeer motor into the back-and-forth turning of Wolfy’s head. He rocks with the rest of the band members, but his head turns independently.
 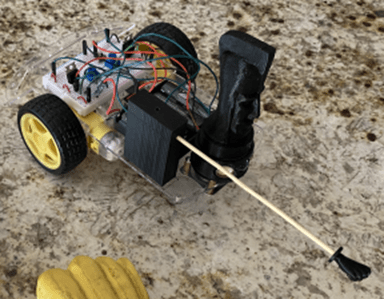 Introducing STEM activities at a summer camp is particularly challenging. Especially when there is a wide variety of ages and interests. Particularly difficult is finding projects. The projects must appeal to the wide age range. Also, they must be “doable.” This year, we made “Joust Bots.” I started with a beam following robot and added a “rider” and lance. Development of the kits took some time. Fortunately, I had plenty of time over the past two years during the pandemic. I got a 3D printer, and it was used extensively in the development of the JoustBot.
 It’s not enough that the machine works and it’s not enough that it is buildable, but it must be built safely. That is why this robot uses a breadboard instead of soldering the components to a circuit board. Using soldering irons open the possibility of burns. It is also easier to trouble shoot a mis wired bread board. There was only one “wire-to-wire” connection left in the design and I chose to use a “button splice” to accomplish that connection. The button splice only
  required a firm squeeze with a pair of pliers instead of soldering iron. It also made the build go faster.
 Unfortunately, if a tinned wire gets bent, it needs to be re-tinned. Anticipating that might be an issue, I packed a soldering iron that I could use to re-tin damaged wires. Unfortunately, I left the solder and flux on my workbench at home. With three hours into the four-hour project and only one day left, I was anticipating that many of the campers wouldn’t have working robots at the end of camp. That thought was depressing.

 added a fourth task—fixing things. I fixed a small flag display and repaired the “Rock Tree” at my turn-around point.
 I’m back, and I’m beat. I don’t know if it was harder this year, or if it simply the fact that I’m 3 years older than the last time I went to camp. The good news is that I didn’t gain any weight. Also, I didn’t leave too much behind. In addition, every program I ran was a total success. All the campers created Beverage Can robots that worked and most of them took them home. All the campers that took the Joust Robot elective ended up with a working robot and had an opportunity to drive them around on the recreational room’s floor for almost a full 45 minutes. Some campers decorated clock faces that they can take home to remind them of their Camp Quest Arizona experience. Finally, Karaoke was a success once again. What the campers lacked in singing skill, they more than made up with enthusiasm. We conducted it outside this year. BTW, the counselor that teaches wilderness survival skills ran a test to see how far the human voice can be heard. He determined that the distance is 825 meters (0.51 miles). I’m sure that any native creatures within that radius are glad that we’re done for another year. (Sorry about that wildlife.)
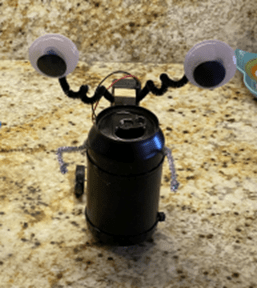 It’s time again to head up to camp, collect beads, and build robots. Of course, that’s just how I see it. The last time that we had a Camp Quest sleep away camp was the summer of 2019. I was getting ready for CQAZ 2020 in March of that year. Then came COVID 19, and everything was cancelled, and preparations were put on hold. There was a day camp and some hikes in 2021 but the weeklong sleep over camp didn’t happen that year either. So…after a 2-year hiatus, CQAZ will happen. It begins on the 25th of June and ends on the 2nd of July.
 JoustBot started out as a simple beam-following robot. Shine a light on the robot and it will move toward the light. As before, I pulled inspiration from what was available
  “I’m the Ghost Rider…My job is taking souls to hell…Don’t get no vaccinations shots…I need the work!”
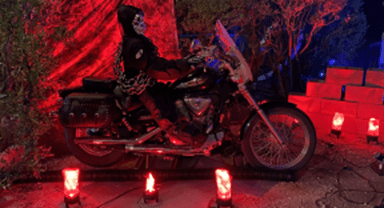 will return as “The Devil.” For the Ghost Rider Instead of programming an Arduino microprocessor, I used a prop controller from Frightprops called the PicoBoo MP3. It made the job easier, but I had some limitations on what I could program into the “show.”
 Every year it gets a bit harder to set up, but I think I’ll keep doing it as long as I can and as long as people appreciate the effort.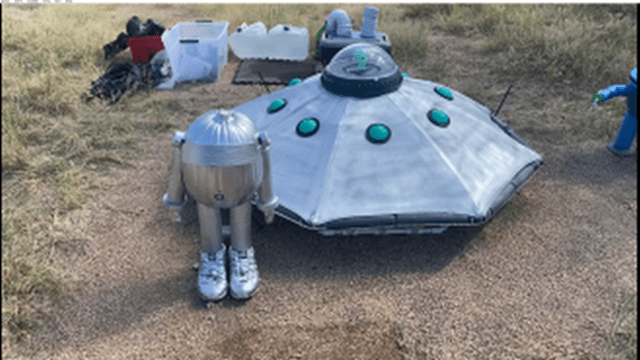
 A lot has happened since I last wrote in this blog. The


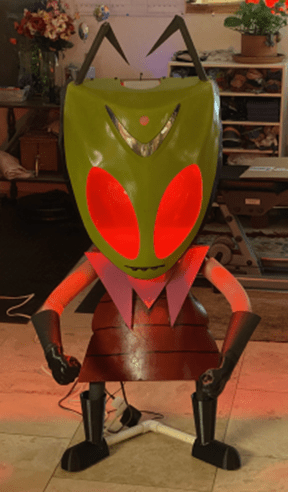 Are you feeling it yet? Things are starting to get back to normal after the pandemic. Frequent readers of this blog will know that this means I’ll be getting ready for Halloween six months ahead of time. However, before I can properly prepare for the next Halloween event, I must take care of a few things. The theme for the Lacey’s Haunted Graveyard for 2019 was “
 found an abandoned slightly damage motorcycle faring on a dirt path during a Geocaching adventure. I love turning other people’s trash into useful items. Invader Zim is a fine example of upcycling. Before I can start preparing for the new 2021 theme, I decided to take care of him. Perhaps someone else will want him for their display.
 Here is the faring I found in the field. I drug it home because I saw something alien in it. I didn’t know what though. I posted a picture on a Halloween DIY FaceBook page, and someone commented, “My tallest.” I didn’t know what the hell she was talking about, but my Google Fu was strong, and I soon found Invader Zim. As a boomer, I was not familiar with the cartoon. I watched a few episodes. There was an “Invader Zim” in there. I just had to bring him out into the world. I’ve told this story
 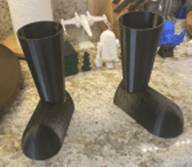 I started with TinkerCad and designed a new set of boots. These are better than the original pair and should last. Next, I found an upraised fist and manipulated it to fit the size I needed. It was a simple matter to mirror the right fist into a left fist and print them both out. Of course, 3D printing takes a while. It’s best to have the printer work while I sleep. I tend to watch the printer for too long when it’s working. The total time it took to do Zim’s “upgrade” was about a week, but most of it was done while I was sleeping.

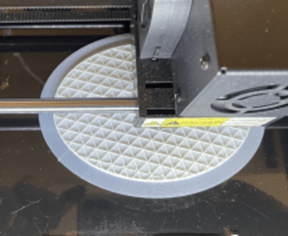
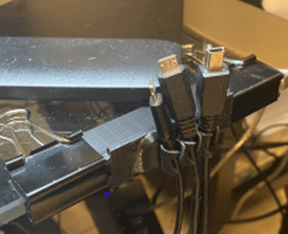 I just finished making a cable holder for the edge of my computer desk. This was particularly fun because I made it using some custom design made in