
A little over two years ago, Nancy and I bought a Sears Kenmore Elite refrigerator. We’re getting to the age where we’re buying things for the last time. The Maytag we replaced was in place for about 18 years. The Sears Kenmore Elite was pretty. It was made of stainless steel. It had LED lighting. It was beautiful, and Nancy loved it. I bought it for her birthday on the 11th of March in 2016. In August 2017, it quit working. We lost all our food and it took weeks to get it fixed. In September, it was working again but in May 2018, it quit working. This time, all the lights went out. It totally died, and I decided to cut my losses and replace it. We went to Lowes, waited patiently for a sales representative, found that they didn’t have what they had advertised, and went to Home Depot. This was the identical series of events that resulted in us getting our dish washing machine from Home Depot. I wonder why I gave Lowes the first opportunity again. I probably won’t the next time. Next time, I’ll go straight to the Home Depot and skip Lowes. I’m sorry Lowes. You failed…again!
I’ve written about the Sears refrigerator three times…First Time, Second Time, and Third Time.
The new refrigerator is a fancy Whirlpool 4 door behemoth that directly replaces the Sears Kenmore Elite. Once we place the order, I went on to Craig’s List and picked up a basic used Whirlpool model for the garage. I paid a fair price and the person that sold it delivered it to my garage. We transferred all the food from the dead Sears Kenmore to the box in the garage. This time we had zero food loss.
The new refrigerator was delivered on schedule and the people took away the broken Sears box. Good Riddance! Of course, I’m out over $2000 and there is no guarantee that the new box will last any longer but for a small period of time, I’m happy, my food is secure, and now I have a place in the garage to store my extra beer.

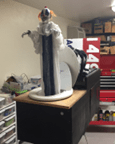
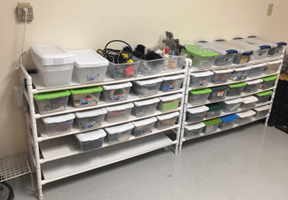 I built my first storage rack
  Camp Quest Arizona is not until the end of June but it’s already on my mind and on my workbench. I had super response and success with last year’s program—
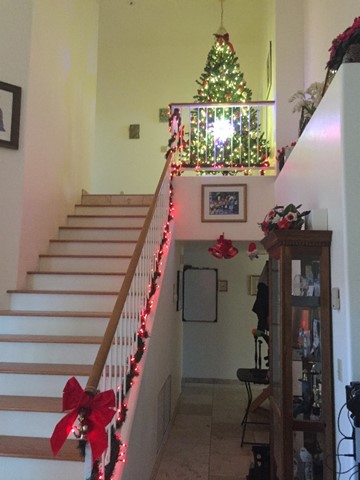 Yes. The Atheist said it, “Merry Christmas!” So, what? It’s Christmas Eve and it’s appropriate. I went to Walmart today to get an HDMI cable and exchanged the greeting with quite a few people today. On the 21st, we celebrated Winter Solstice at our house.


 are very scary to some people. At least one person messaged me to tell me that her
 Yes! “It” is done. Please check out the
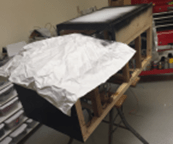
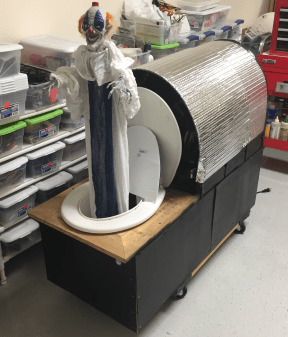
 Skinning the prop involved cutting repurposed political signs, attaching the pieces to the framework, and painting them black. The “culvert” is made out of silver colored insulation material laid over bent fiberglass rods. The fiberglass rods are perfect in all ways but one. They are light and easy to bend into a smooth pipe-like shape. What is less than ideal is the fact that they must be handled with gloves. Fiberglass splinters are sharp, painful, and difficult to find and remove.
 Greetings Halloween Geeks and Geeks adjacent! Here is a picture of the IT prop “in-the-bones.” In other words, there is no skin. When I last reported I had everything working on the bench—separately. Turns out that is an important distinction. Everything worked and when assembled, it didn’t. It’s like reverse synergism. I anticipated a problem with mating the store bought jumping spider with the homemade portion. I did encounter that problem and found a solution quickly (and elegantly). Elegantly in that the finished prop will no longer require a set of AA batteries be installed in the spider. The solution was to split power from the main supply, regulate it, and provide it to the spider only when required. It took a bit of fiddling but now works fine. However, I didn’t anticipate that the noisy auto antenna motor would interfere with the audio amplifier.
 seems to fit the situation. Once the spider backs down, the tray moves the spider back and the clown rises once again from the toilet. Beautiful! Except, the voice only worked once and was silent in subsequent cycles. WTF?
 Before I became an electrical engineer, I was an experienced technician. It knew it would take every skill I had to find what was causing this situation. Isolating the audio board power supply didn’t work. Isolating the triggering connection to the audio board also didn’t work. I reasoned that there must be radio frequency interference from the auto antenna actuators.
 I finished the last installment of “Building IT” with “what’s next?” What was next was to wire the circuit boards and test their functions. The picture here doesn’t look very different from yesterday but that’s the nature of projects. In the beginning, change is obvious. First there is nothing then there is something. In the middle of the project very little seems to change. It’s like the project absorbs work.
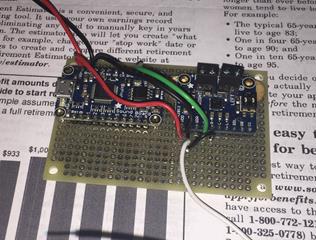 Greetings! In the 11 days since the last installment of “Building IT” a lot has happened but that doesn’t mean that the work has stopped. Building IT is quite a project. almost to the same level as the first pneumatic clown prop that I built. In some ways IT is a step back. When I retired in 2008, I thought that Halloween was going to be great but it wasn’t. I had “Jack” but the clown prop that I built was a horrible failure. For one thing, I started too late. The clown was supposed to come out of a box. It used and electric actuator that didn’t work well. He was slow and boring. Even so, the Halloween was still fun. I still had my trustworthy “Jack.”
 Building IT is quite a project and projects need to be divided into individual tasks. Some tasks are easy or familiar because I’ve done them before. Some tasks are unfamiliar and challenging. These are the “hard stuff.” On the other hand, there are familiar tasks that must be accomplished first. For example, I’ve built props in the past and building a box is something that might be considered easy or familiar. However I can’t mount the linear actuator which is rather challenging without the box to mount it to.